Tarcode's Blog
React Native Image Uploading with Cloudinary
September 25, 2017

Greetings creatures of the world. Today, we’re gonna upload images to Cloudinary using React Native! 😬
(“Cloudinary is the image back-end for web and mobile developers. An end-to-end solution for all your image-related needs.” - The Cloudinary Website)
First you wanna make sure you have the React Native CLI installed (We’re not using create-react-native-app). Then, you wanna signup up to Cloudinary if haven’t already.
Now let’s get down to business.🤓
Step 1
react-native init imageupload
cd imageupload
npm install
Create the folder where we’ll keep our main component (Which we’ll render to Android and iOS):
mkdir app
Create the component file:
touch app/index.js
Step 2
Replace index.android.js and index.ios.js with the following:
import React from 'react'
import { AppRegistry } from 'react-native'

import App from './app/index'

AppRegistry.registerComponent('imageupload', () => App)
Step 3
Run npm install —-save react-native-image-picker react-native-fetch-blob
then react-native link.
That should successfully install and link the packages required for accessing the file system (included with react-native-image-picker) and posting the image data to Cloudinary (react-native-fetch-blob).
Step 4
Before we can access files on the device, we have to ask the user for permission first. Follows these instructions to allow permissions for Android and iOS:
iOS
Add this to ios/app_name/Info.plist:

Android
Add this to android/app/src/AndroidManifest.xml:

Step 5
This is the main component we use to do everything (app/index.js).
Our imports:

The component class:
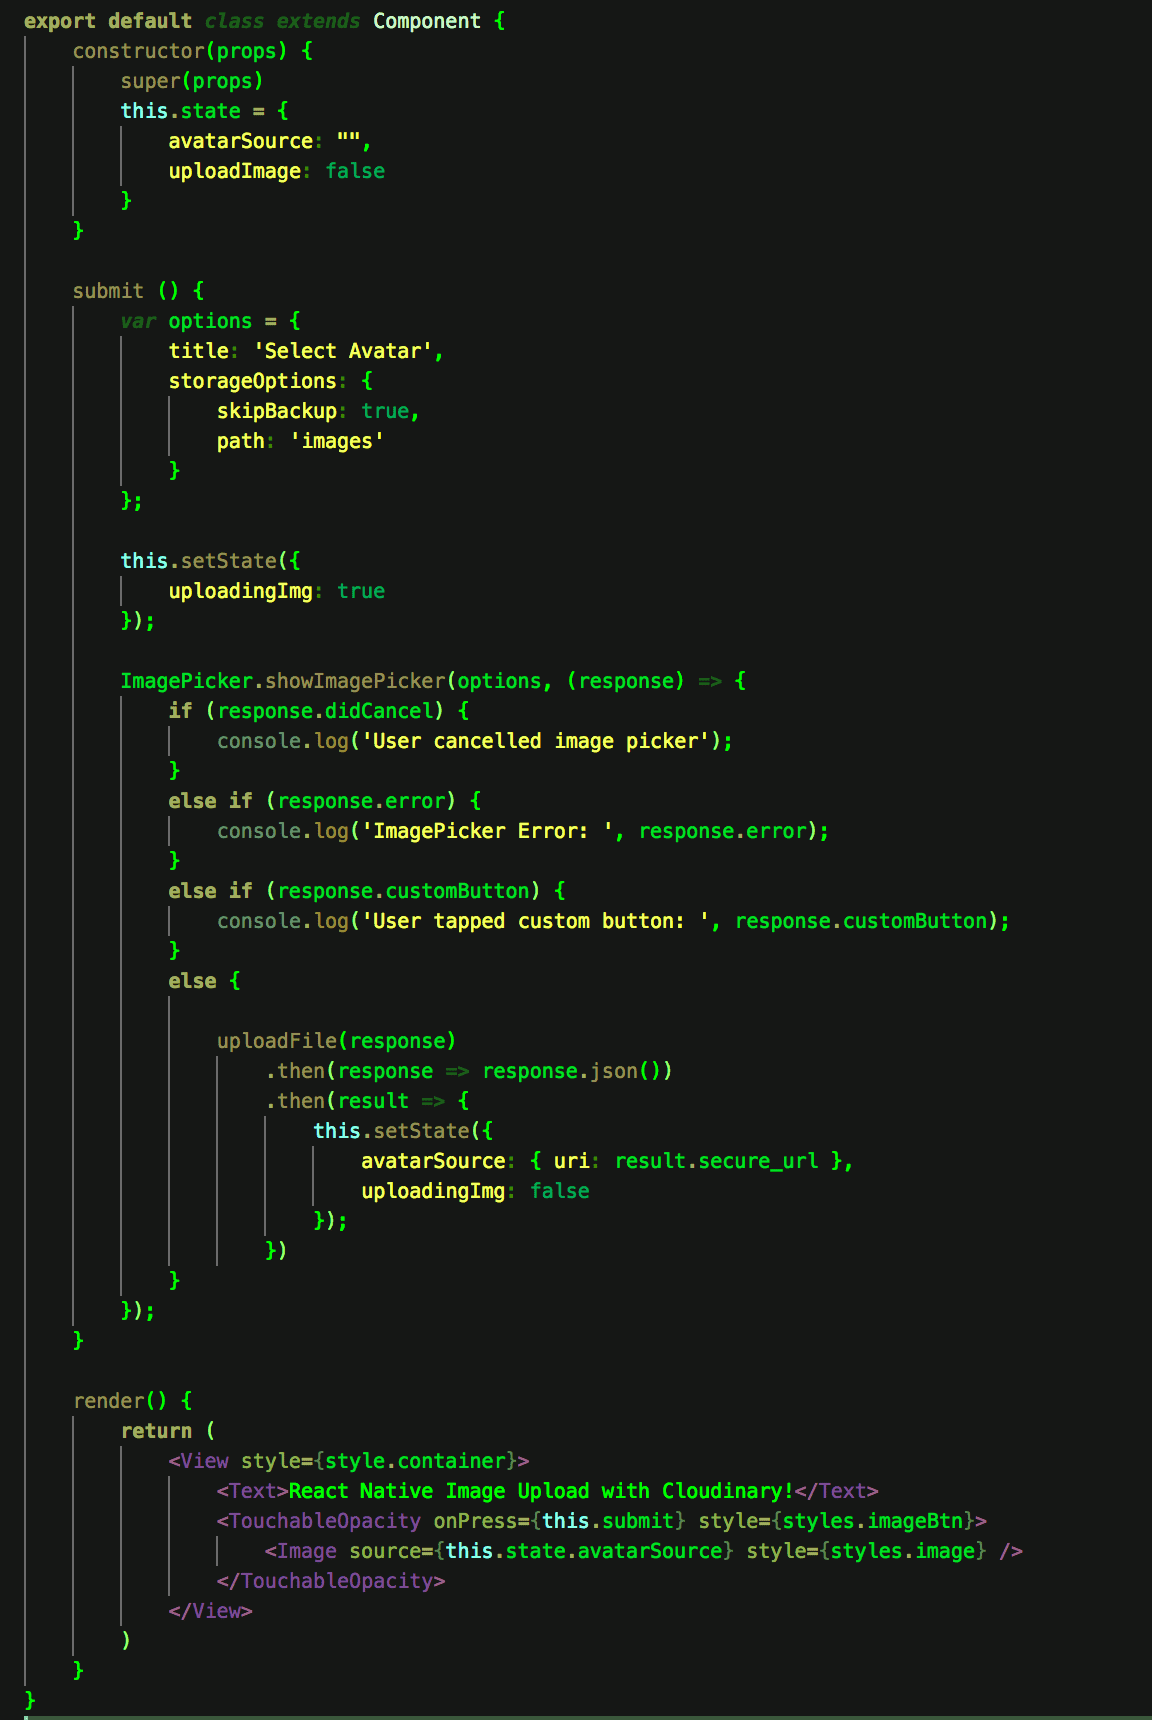
Replace the Cloudinary name and upload preset in the upload method with your Cloudinary name and upload_preset:

To create an upload preset:
Login to Cloudinary
Click on the settings icon (Gear icon)
Click on the Upload tab
Scroll down to upload presets and click add upload preset. Use the upload preset name you just created.
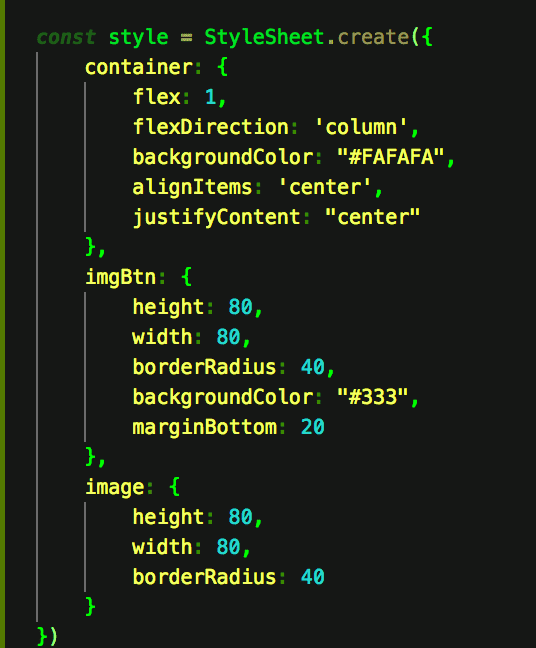
The styles:
Step 6
Once that’s all done and dusted, run react-native run-ios or react-native run-andoid and upload your images to Cloudinary!!
👽 🤓 👾
 By Taariq who lives in Cape Town. He also happens to computer alot. You should probably follow him on Twitter